Dehancer : A Film Photographers Review
In today's age, film photography has regained massive popularity. And for good reason. Film offers something to the photographic experience and image quality that digital just cannot replace - the grain, the bloom, the halation, subtle color shifts, the soft focus, and many more random variables that occur with an analog medium. As a professional photographer, I shoot both film and digital side by side for the majority of the time. Matching digital images to film can be difficult. I have always tried to get the film “look” with digital cameras. I first started with adapting vintage lenses to mirrorless bodies to create images and an experience similar to that of a 35mm film camera. Along with vintage lenses, I often use a Tiffen Black Pro-Mist filter ⅛ to apply a softness, grain, and bloom to my images. These techniques certainly help add filmic characteristics but still look very digital.
I had the pleasure to try Dehancer for Lightroom for a review of my experience. Dehancer is a plugin for Adobe Photoshop, Lightroom, Capture One, as well as more popularly known for video production. It offers a wide array of tools and effects to apply analog film emulsions and characteristics to digital imagery. Dehancer appealed to me because of the many film presets available - effects like halation, bloom, grain, and the ability to adjust color in the “color head” module, similar to that of a classic film scanner or enlarger.
DISCLOSURE: All these thoughts and opinions are my own. I ran Dehancer on Windows 11. All images were shot with a Nikon Zf and various adapted vintage Nikkor lenses and a Tiffen Black Pro-Mist ⅛.
Platform

Screenshot of the user interface
In terms of ergonomics and workflow, there is a learning curve. The sliders are a bit sensitive and it can be difficult to settle on a degree of effect. It just takes some getting used to. I did encounter a few bugs and had to contact support for a solution. After some emails back and forth with their helpful support team, and some updates to download, I finally had a working plugin. Just par for the course with anything of this nature, but certainly something worth mentioning.
I did notice that upon opening Dehancer, it will apply your previous edits to the current photo. This was a drawback to me especially if working with a variety of photos with different exposures. I found the solution was to go from the default landing screen of “Films” to the secondary tab of “Presets”, and select “Original”. After applying “Original” to the image, I would proceed with further edits such as applying a film preset than adding effects.

Resetting the image to default with the “Original” preset option before further editing
Editing in Dehancer is not designed for speed. Only one image can be uploaded at a time and it creates a working tiff. If you know anything about tiff files, you know they're usually massive. I would prefer to work one image at a time with files so large to save processing speed anyways, but it is certainly not a fast process and that is a limitation in terms of mass editing abilities.
Profiles
Dehancer is known not only for their film effects, but also film emulation presets. There are dozens of different film presets to choose from. Black and white films like HP5, XX, Acros, XP2, and a couple of other rare or discontinued films. And, of course, there are color options like ColorPlus, Portra 160/400/800, Fujicolor 200 & PRO400H, to name a few. As someone who has a lot of experience with photographic film, these presets are decent. Nothing will ever replicate film, so there is some leeway here for criticism. To say that these presets accurately represent the native emulsion would be an understatement, but they are close enough that it is an option that is acceptable for giving your digital images a filmic look. Dehancer does offer a unique “push/pull” feature which applies slight color and exposure shifts similar to how film would behave.
The Dehancer manual recommends preparing your RAW files as follows:
Profile: Adobe Standard Exposure: –1 Contrast: –40 Blacks: +60 Curve: Linear Sharpening = 0 Noise Reduction = 0 Color Space: sRGB IEC61966-2.1 Bit Depth: 16 bit
However, I gravitated towards my unique method. I noticed that if nothing was done to the files upon import to Dehancer, the exported file would tend to have clipping in highlights and shadows, and overall look too processed and dense.
In light of this, I experimented with using Auto settings in Lightroom to open up both shadows and highlights in the image - as well as balance the histogram. Upon applying Auto settings, I would reset the Saturation and Vibrance sliders in Lightroom to 0 to avoid any color shifts and to work with a neutral color balance. If Auto settings would bring the exposure slider below 0, I would naturally reset to 0 as that was the initial exposure within the camera. In general, a brighter image will respond better to a preset than a darker one. I would experiment with Auto White Balance as well, but it is not a one size fits all. More often than not I would see what Auto WB would look like, and from there manually adjust the image to what I think appears normal for the scene or idea. Upon all of this preparation, I would load the image into Dehancer.
Once in the plugin, I would choose a desired Film. I noticed that exporting from Dehancer with my previous Lightroom adjustments applied would give me the film preset characteristics - such as the shadow and highlight rending, contrast, and color - without crunching the histogram in the final tiff file. Generally, at this stage, after export from Dehancer with the preset and effects applied, I would call the image complete with no adjustments necessary and export as a JPG.
As aforementioned, whether the presets are accurate or not is hard to tell. Film can behave differently according to lighting, exposure, color temperature, and even lenses, scanners, and expiration date. Color film is especially difficult to replicate for these reasons. Adjusting a digital image to have filmic colors can be a lost cause at times and can cause frustration in many photographers.
Black and white, on the other hand, is another story. The BW profiles from Dehancer are excellent. When working with black and white - removing the layer of color - you can focus more on tonal values, contrast, light, composition, and the essence of the photograph. Due to the variability of color film, emulating BW becomes much easier. I will add that some of the BW presets export as a color file, so I would convert it to monochrome on the tiff. Nonetheless, the Dehancer profiles provide a great option for photographers other than just a preset pack off the internet.
Effects
The film effects available in Dehancer were certainly my favorite tools within the software. Some characteristics inherent to film simply cannot be matched using basic tools within the Lightroom interface. Dehancer worked flawlessly for some of these effects. Specifically grain, bloom, and halation.
Dehancer tools include:
Film Developer
Film Compression
Expand
Print
Color Head
Film Grain
Halation
Bloom
Film Damage
Overscan
Vignette
In my photography I try to keep things simple, in my shooting style and my edits. When working with Dehancer, I found it is very easy to overdo it. Because of this, I focused on the most important film characteristics, in my opinion - those being, grain, halation, and bloom.
Grain: Grain is the building block of photographic film. It is the photosensitive material that is responsible for making a film photograph. It is something that digital will always lack. Emulating grain is no easy task. Dehancers grain module is quite extensive and offers many options and tools to give various results. Firstly, there are preset options available within the film module. You can choose a film size from 8, 16, 35, and 60mm and a corresponding ISO from 50, 200, 250, and 500.

35mm ISO 500 Film Preset
These default settings are generally pretty good.
If you want more control, you can go to the “Custom” option within the Film Grain Module.

“Positive” Film Type
There is also a “Film Type” option within the Film Grain Module which you can toggle between “Positive” and “Negative”. I had mixed results with this. I often thought the “negative” option was too chunky and unpleasant. With some tweaks in the custom menu it could be fixed, but I mostly used the “positive” option.

“Negative” Film Type
For my actual film photography work, it is more often than not scanned with a Fujifilm Frontier SP-3000 scanner. These scanners are about as retro as they come, but still provide the highest quality of scans even today. I have noticed, however, there tends to be a lot of color noise at higher resolutions. I typically run all my Frontier scans through color noise reduction at 100% within Lightroom. This works really well. It eliminates the noisy and random pixels of RGB hues and neutralizes them to similar colors surrounding them. It does not alter the image the way the typical “noise reduction” feature would. In Dehancer, there is a “Color” slider within the Film Grain module. This is a neat feature, as it essentially adds color noise the same way a film scanner would. I think this is a very interesting feature and can be useful in certain cases.

Here is a version of the image with no grain applied at all. As you can see it is a dramatic difference, and how easy it can be to overdo it when so many options are available.

An edit with larger grain size
I attempted to apply similar grain structures on a BW image within the Lightroom Effects module to compare to that of Dehancer. I think the Dehancer grain has much more softness and better fall off but the Lightroom grain has better sharpness.
Halation: Halation is a beautiful effect that occurs in most 35mm film when overexposed. Essentially, it is when light bounces off the pressure plate within the camera, back into the film. When it reenters the film, it passes back through the red layer, causing glowing red highlights on the final image. This is a very beautiful and stylistic effect specific to film. It is most commonly known on CineStill’s films, as they have no antihalation layer. It can occur on other films as well given the right exposure conditions. The Halation tool in Dehancer gives an extensive array of sliders and adjustments to be applied to the image. This is one of my favorite features of Dehancer.

This is the best result I got from the haltion tool, in my opinion.
When using the Halation tool, I use the Mask Mode to isolate the halation for more precise adjustments.

Here, the source limiter slider is set to 50 and can control the intensity of the halation from the highlight source. *This screenshot is brightened for better visiblity.
This is a really useful and fun tool for a digital film emulation effect. It has a lot of versatility and the results are quite good and can look very similar to film. It is an effect within an image that can certainly make one question whether it is truly film or digital.
Bloom: The Bloom feature is also quite good. Bloom is an effect in the highlights of film where it essentially spills over into the outside of the highlight area. It is very similar to halation; however, I think of it more like a centralized haze originating from the highlight point and gradually dispersing as it gets further from center, while halation is a glowing red within the bloom.

Default bloom in “Mask Mode”. *Image brightened for better visibility.
Dehancer’s Bloom tool is just as impressive as the halation tool. The versatility and amount of tools is very useful when fine tuning an image effect, especially one so complicated as bloom. However, I did not apply this effect to my own images, except the sample photo. My logic here is that I am trying to do as much as I can in camera. For bloom in camera I use a diffusion filter. For all of these photos I used a Tiffen Black Pro-Mist ⅛ filter. I think the ⅛ Black Pro-Mist is decent for bloom. After seeing the Dehancer Bloom tool, I started thinking about applying more bloom in camera. I am interested in the ¼ Pro Mist filters for this but those will be a different post.
In my day job, I do a lot of photo printing in a minilab and on inkjet. To me the print is the final form of a photograph. I do not have any darkroom experience and that is soon to change being that I am a film devotee. The print — regardless if it's made optically or digitally — is what turns a negative into a positive, or an image file into physical form. I did not use the “Print” tool on Dehancer for this reason as well. I, in a sense, treat my digital files as negatives - as they are viewed through a “lightbox” light a phone or monitor the same way a film negative is. It isn't until it becomes a print, that is it is a final photograph. I typically adjust images with a later print in mind and will often have to adjust further when printing.
I made a couple test prints from some Dehancer images and I do think the results are promising. I printed the BW mushroom photo as an 11x14 on a Fujifilm Frontier. The results were decent given the printer's abilities but the grain structure and tonal rendering of the HP5 preset look beautiful on paper. I made a couple smaller prints of the yellow chair picture, one being a Dehancer edit, the other being my own attempt at a “Portra” emulation. I think the density of the Dehancer image came out too strongly on the print and I preferred the softer contrast of my version more. Similarly, I preferred my grain emulation attempt with Lightroom's tools for this image when it was printed. There are a lot of factors here however, such as print size, and all the settings in Dehancer that can allow room for further adjustments.
Overview
Things I liked :
Emulation profiles
The film emulation profiles are quite good. I wouldn't say they are accurate, given the variability of film, but they are a great starting place for applying a similar filmic tonal structure to digital image files. The BW profiles gave me great success and are definitely worth exploring.
Halation
The halation tool is excellent. This will be my main use case Dehancer. It allows me to create and manipulate a quintessential film characteristic with quite realistic results.
Bloom
The bloom tool is also very good. It behaves just like the halation tool in its function and intensity. The bloom effect itself is quite realistic as well.
Design Aesthetic
Dehancer has a really appealing platform. The buttons and sliders all look pleasing and it blends seamlessly with the Adobe suite.
Things I didn't like :
Bugs
When I first started using Dehancer, I encountered a few glitches in which I needed to contact support. This is typical with any software, however I did have to dig a little deeper into the color profiles of my display and Lightroom.
Tiff file sizes
I'm not sure if there is a way around this one being an external plugin, but tiff files start to wear on the hard drive over time. Because of this, I also am very selective about what I edit in Dehancer. Images for a certain look or project, but certainly not everything.
Bulk edit
In Dehancer, it is an image by image tool. This makes it near impossible to rely on it for projects with high image count. A lot of my work requires hundreds to thousands of images, making Dehancer not an option for certain projects. That being said, some of my personal work moves very slowly and Dehancer is perfect for those cases.
Dehancer is overall a great tool to have in your toolkit as a film and digital photographer. It takes some getting used to and there is quite a learning curve, but it offers an array of looks and tools valuable for those interested in applying film characteristics to digital photography. Dehancer is an incredibly promising piece of software which not only helps bridge the gap between film and digital, but also keeps photography as the medium.
Thank you for your time reading this review, and huge thanks to Dehancer for this opportunity!
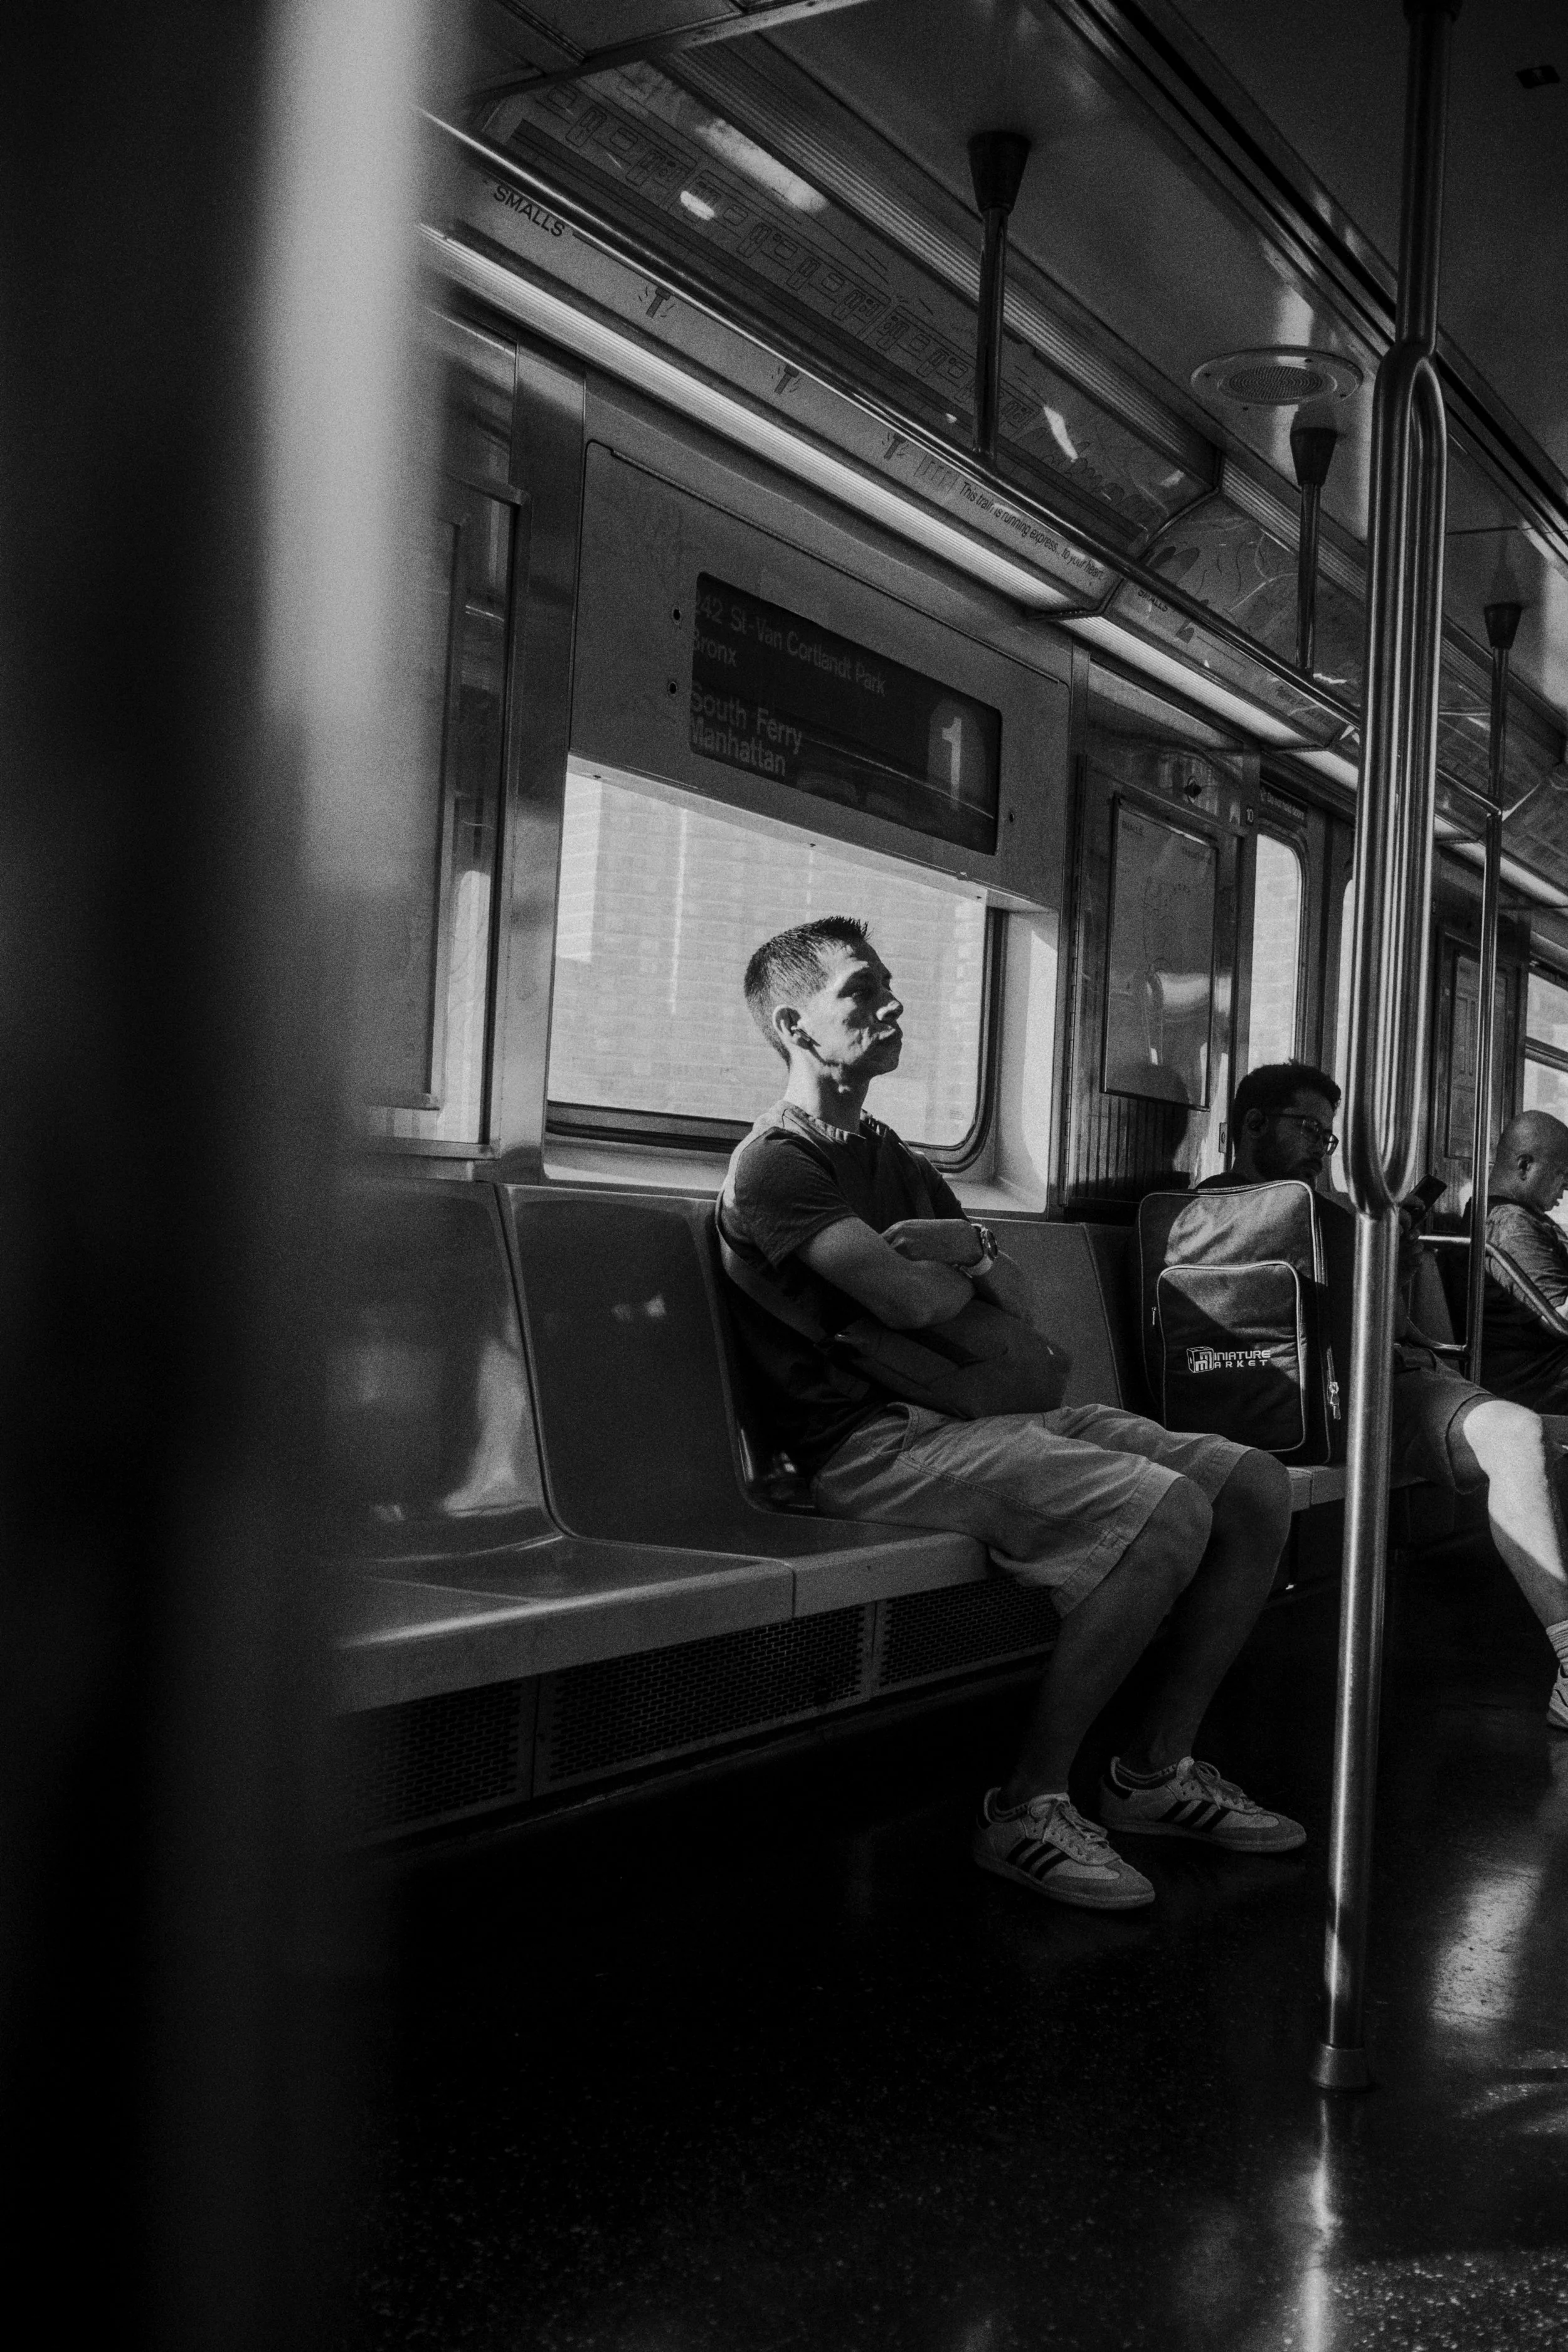
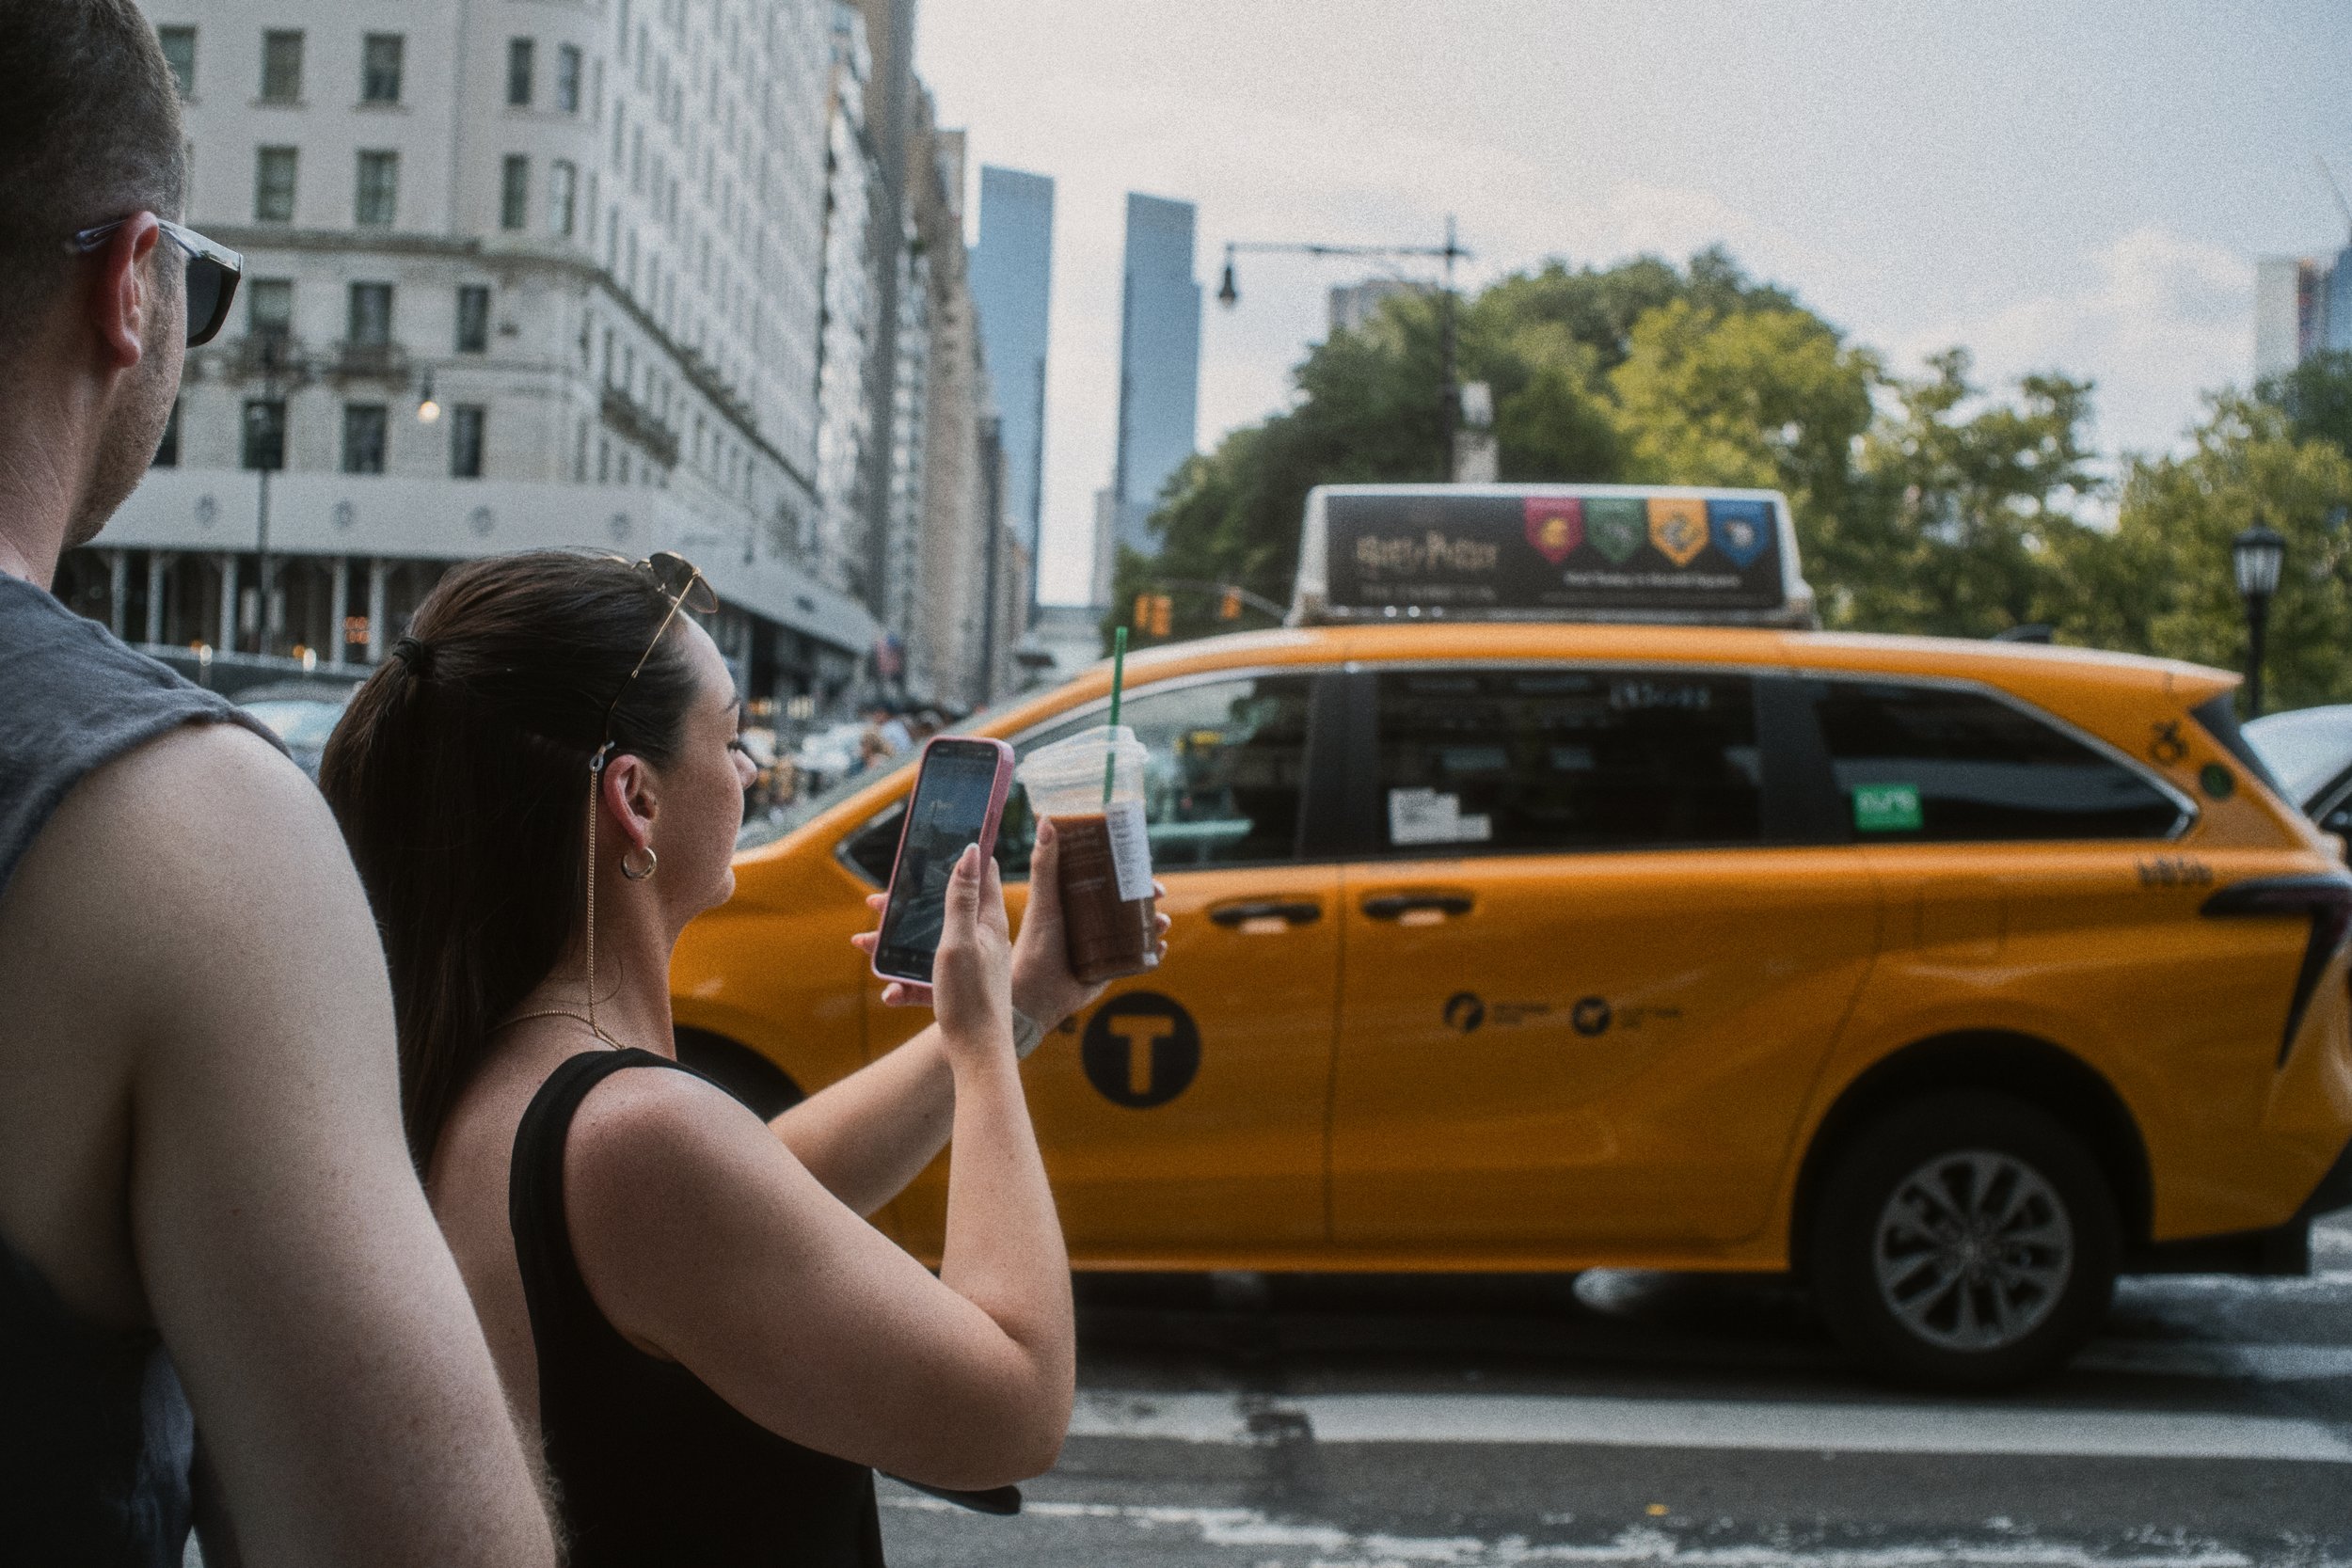
Please enjoy this gallery of sample images edited with Dehancer
Use my code AGXISO for 10% off your purchase of Dehancer